AI Background Remover — Remove the Background From Any Image
Upload a photo and the AI finds the person, product or object in it and clears out everything behind them. What comes back is a PNG with a real transparent background: put it on a white sheet for a marketplace listing, on a colored block on your site, into a slide, a sticker or a signature line. Nothing to trace by hand, no masking, no lasso.
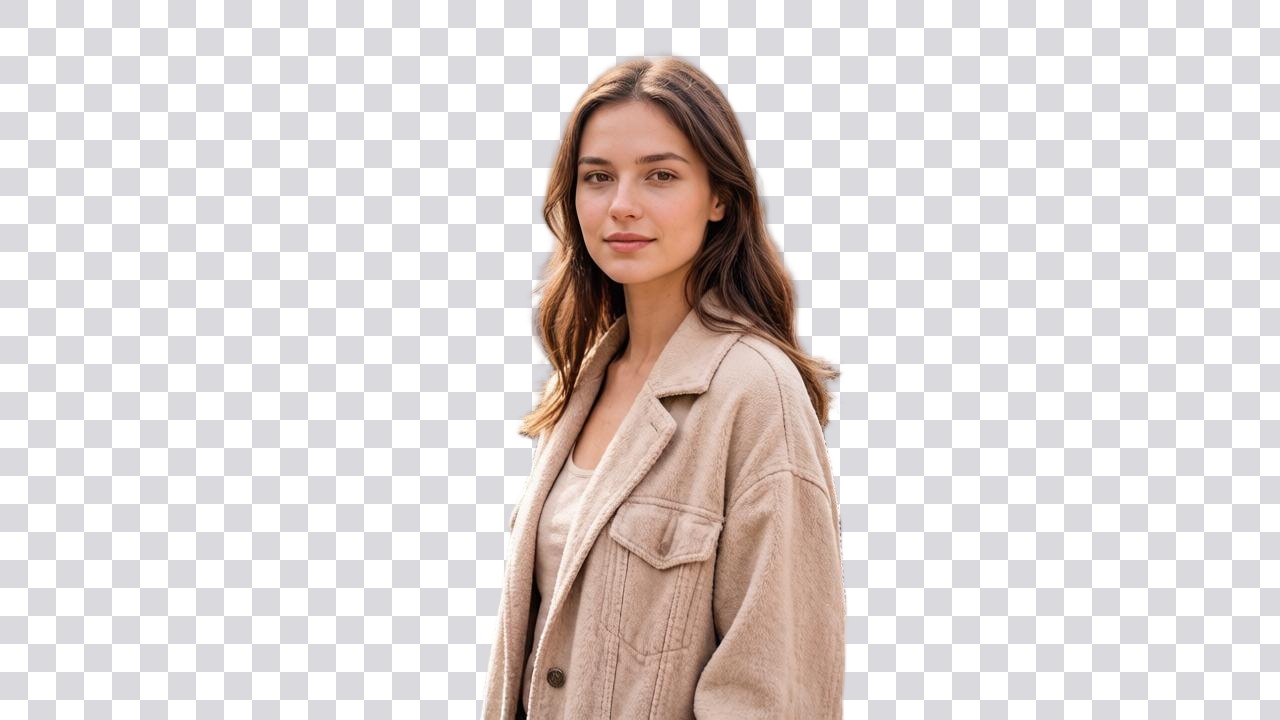
 BeforeAfter↔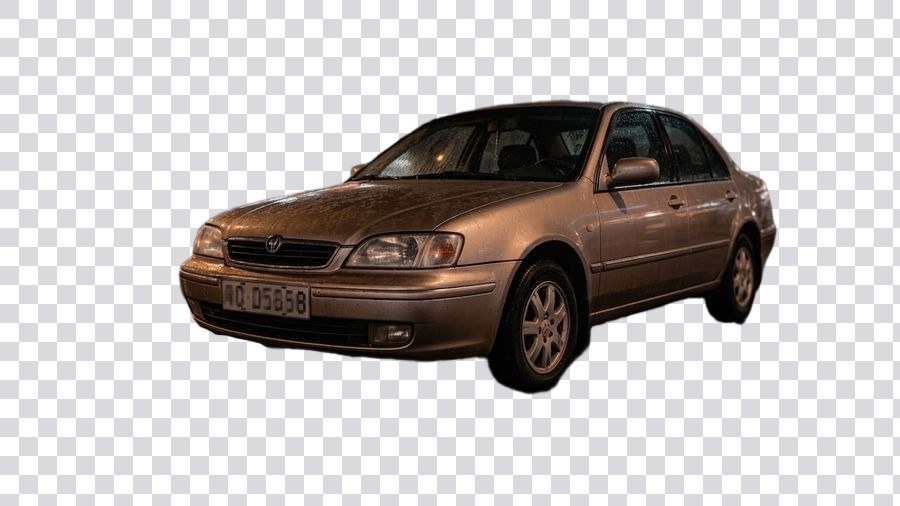
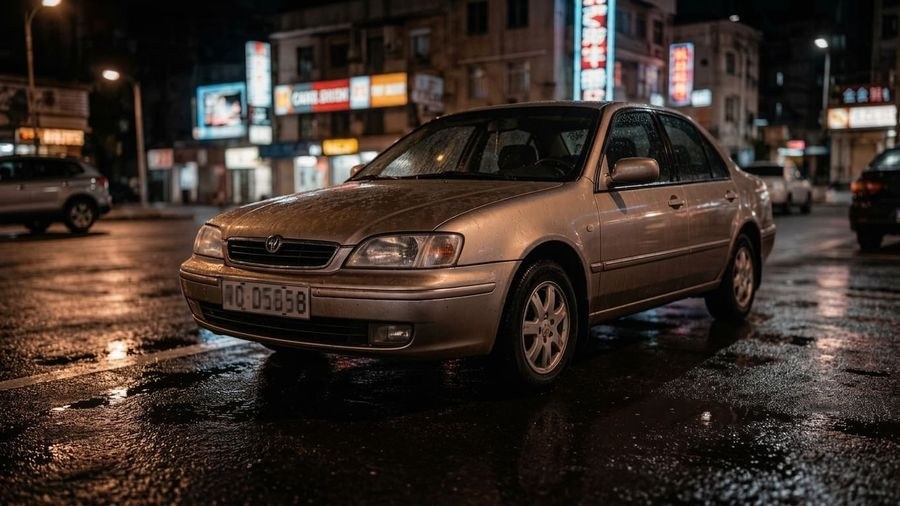 BeforeAfter↔
What an AI background remover does
Removing a background means separating one subject from everything around it. The AI works out where the person, the product or the object ends and the room, the street or the tabletop begins, then clears away everything on the far side of that line. What is left is a cutout: the subject, and nothing else.
The old way was manual. Trace the outline with a lasso or a pen tool, go in close on the hair, refine the edge pixel by pixel, feather it, check it against a dark background, go back and fix the bits you missed. Several minutes for one photo, and hair alone could eat most of them. Here the whole job is an upload and one button.
What separates a real cutout from a fake one is what sits behind the subject afterwards. On this tool the file that comes back is a PNG with a genuine alpha channel: the background is not painted over in white, it is simply not there. That is why the same cutout works on a white listing image, on a colored block on a website and on a sticker, without a rectangle showing up around it.
How to remove a background from an image
All of it happens in a browser tab, on a phone, a laptop or a tablet. There is nothing to install, no mask to paint and no settings to learn — the only choice you need to make is Standard or Pro.
Transparent PNG: what you actually get
The result is a PNG in which the background pixels are empty. Not white, not a very light gray, not a flat color that happens to match your slide — empty. That emptiness is stored in a fourth channel alongside red, green and blue, called the alpha channel, and it is what lets the subject sit on anything you put underneath it without a visible box.
The gray-and-white checkerboard you see in previews is not in the file. It is how image viewers and editors draw "nothing here" on screen, the same way a ruler draws inches. Download the file and the checkerboard does not come with it. A screenshot of the preview, on the other hand, absolutely does — so save the result with Download rather than grabbing the screen.
Why it has to stay a PNG
This is the single most common surprise, and it is worth being blunt about it: JPEG cannot store transparency at all. The format has no alpha channel. The moment a transparent image is saved, exported or converted to JPG, every empty pixel has to become some actual color, and it is almost always white — occasionally black. Nothing went wrong with the cutout; the file was simply put into a container that has no room for the transparent part.
So the rule is simple. Keep the file as PNG from download to final use. Watch for the places that quietly convert: "export as JPG", a compressor set to JPEG, an email client that re-encodes attachments, a chat app that flattens what you send, an old template that only imports JPG. If you have to hand over a JPG, that is a sign the destination wants a solid background anyway — put the cutout on a white or colored sheet first, deliberately, so you control what fills the space instead of finding out later.
WebP can carry transparency too, and so can the layered files editors use internally. But PNG is what this tool returns and PNG is what every design app, slide deck, print shop and storefront accepts, so there is rarely a reason to move off it.
Hair, fur and the quality of the edge
Edges are where cutouts are won or lost, and everybody has seen the failures: a person whose hair has been shaved into a smooth helmet, a pale glow of the old background still clinging to a shoulder, a jagged staircase along the arm of a pair of glasses. Those are the three things worth understanding before you upload.
The overall shape of a hairstyle and the individual strands along the outline of the silhouette come back — this is the case the tool is built for, and a pet's fur behaves the same way. What can get lost is the very finest material: single flyaway hairs lifted away from the head, wisps against a busy or similarly colored background, the fuzz on a mohair sweater. A frame where the subject stands clear of the background gives the model far more to hold on to than one shot against a patterned wall.
A glow around the cutout is old background color that was blended into the boundary pixels by the camera itself, before any software touched it. It shows up most when the subject and the scene behind it are close in tone — a blonde head against a beige wall, a white mug on a cream tablecloth. If you can choose the source frame, choose the one with contrast behind the subject. If you cannot, check the result on a dark background as well as a light one, because a fringe that is invisible on white jumps out on black.
Semi-transparent things are cut along their outline, not by their own transparency. A wine glass, a veil, a plume of smoke or a pair of tinted lenses comes back as a solid shape with whatever was behind it still trapped inside, rather than letting a new background show through. Small gaps behave the same way: the opening between the temple of a pair of glasses and the cheek, or between a strand of hair and the shoulder, can end up filled in rather than punched out.
Mesh, netting, railings, bicycle spokes, lace and wicker have more hole than material. The outline is found correctly, but the tiny openings between the bars may be closed up. If those gaps are the point of the picture, look at the result at full size before you commit to it.
One habit is worth more than any of this advice: open the finished PNG at 100% and run your eye along the boundary before you publish it. It takes ten seconds and it catches everything above.
Product photos for Amazon, eBay, Etsy and Shopify
Marketplace galleries want the item and nothing else. A cutout gets you there from a photo taken on a kitchen counter: the mug, the necklace, the sneaker, the candle, separated from the room it was shot in, with the edge already clean.
The main image of a listing is usually the strictest part. Storefronts typically ask for the product on a plain, even field — most often white — filling most of the frame, with nothing else in the picture. A transparent PNG is the ideal middle step for exactly that: drop it onto a white canvas at whatever dimensions the listing calls for, center it, leave the margin the platform wants, and you have a main image built from your own photo rather than a re-shoot. Every marketplace publishes its own image requirements and they get revised, so check the current rules of the one you actually sell on — what this tool gives you is the cutout, cleanly.
The same file keeps paying off after that. The gallery shots go on white, the ad creative goes on a brand color, the size chart and the comparison graphic take the item on transparency, the lifestyle composite puts it on a wooden table. One cutout, every channel, and the product looks identical in all of them because it is literally the same pixels.
If you would rather have the finished frame handed to you with a clean studio field already behind the item instead of building it yourself, that is the neighboring tool: change background.
Portraits, headshots and profile photos
A LinkedIn photo, a headshot for a resume, a team page, a speaker card for a conference, a staff directory, an agent's listing card, a badge for an event — all of them are the same picture problem. The portrait is fine; the kitchen, the parked cars or the conference carpet behind it is not.
Cut the person out and you decide what goes behind them: a plain light field, the company color, a soft gradient, a slide. Because the file is transparent, the same headshot can be dropped into a dark deck this week and a white web page next week without being re-edited.
Worth knowing: the subject itself is not touched. The tool separates, it does not retouch. Faces are not smoothed or reshaped, skin tone and clothing color stay as they were shot, the pose and the crop are unchanged. That is a feature for a headshot — nobody wants an AI version of their own face on a professional profile — but it also means a cutout will not rescue a photo that is dark, soft or badly lit. Fix those first with the photo enhancer or unblur image, then cut out.
For the source frame, the same advice as always helps most: even light on the face, the person standing clear of the wall behind them, and glasses angled so the lenses are not full of reflections.
Turn a scanned signature into a transparent PNG
This is one of the most useful things on the page and it is easy to miss. Sign a sheet of white paper, photograph or scan it, upload the picture, and what comes back is the signature alone on empty pixels — the ink, without the sheet of paper it was written on.
That file behaves the way a signature should. Placed in a document, on a contract, on an invoice, in a PDF form or at the bottom of an email template, it sits on top of the page instead of covering it with a white rectangle. The signature line underneath stays visible, the form's shading shows through, and nothing has a suspicious pale box around it. A photographed signature saved as a JPG can never do this, which is why so many signed documents have a white patch floating in them.
How to get a clean one on the first try
The same routine works for anything drawn in ink on paper: a monogram, initials, a hand-lettered word for a header, a sketch, a doodle for a card, a handwritten note you want to place in a design.
Two honest caveats. Very fine or broken strokes on textured or recycled paper can come back with gaps — sign again with a heavier pen rather than fighting the file. And whether a picture of your signature is acceptable on a particular document is between you and whoever is asking for it; this tool makes the image, it makes no claim about what any organization will accept.
Logos and graphics stuck on a white box
The other direction is just as common. You have a logo, but the only copy anyone can find is a JPG with a white square baked around it. On a white page it looks fine; the moment it lands on a colored header, a dark slide or a photo, the box appears and the whole thing looks improvised.
Upload it and the white field comes off, leaving the mark itself on transparency. It works for a logo someone emailed you, a mark lifted out of a document or an old brochure, a stamp, a seal, a wordmark, a hand-drawn icon or a small piece of line art. Hard-edged flat graphics are the easiest case there is — the boundary between the mark and the sheet is unambiguous, so the edge comes out crisp.
Two things to check afterwards. A soft drop shadow sitting behind the mark may be read as part of the background and go with it, so look at the result if the shadow matters. And the file is still a raster image — removing the background does not turn a logo into a vector, so blowing it up far past the size it came in at will soften the edges. If you need it larger, enlarge the original first with the image upscaler and take the background off afterwards, so the transparency survives into the final file.
Stickers for chat apps and merch
Sticker packs are built on cutouts. A friend mid-laugh, a cat with an opinion, a pet in a hat, a reaction face from a group photo — the joke only works when the subject sits on the conversation rather than inside a white tile. Upload the photo, take the background off, and you have the transparent PNG that a WhatsApp or Telegram sticker starts from. Both apps set their own size, format and pack rules and revise them regularly, so build from the current requirements inside the app itself; what you get here is the artwork, already cut out.
Printed merchandise works the same way, with higher stakes. A print-on-demand shirt, a mug, a tote, a laptop decal, a die-cut vinyl sticker — the printer needs the artwork on transparency, otherwise a white rectangle gets printed around your design and the item comes back wrong. For anything going to print, use Pro: it returns a larger file, and printers want pixels.
Where else a cutout earns its keep
What cuts out cleanly and what is hard
And one rule that cuts across all of them: when the subject is close in color to what is behind it, the boundary gets approximate. A contrasting background in the source photo does more for the result than anything you can do afterwards.
When you want a scene behind the subject, not empty pixels
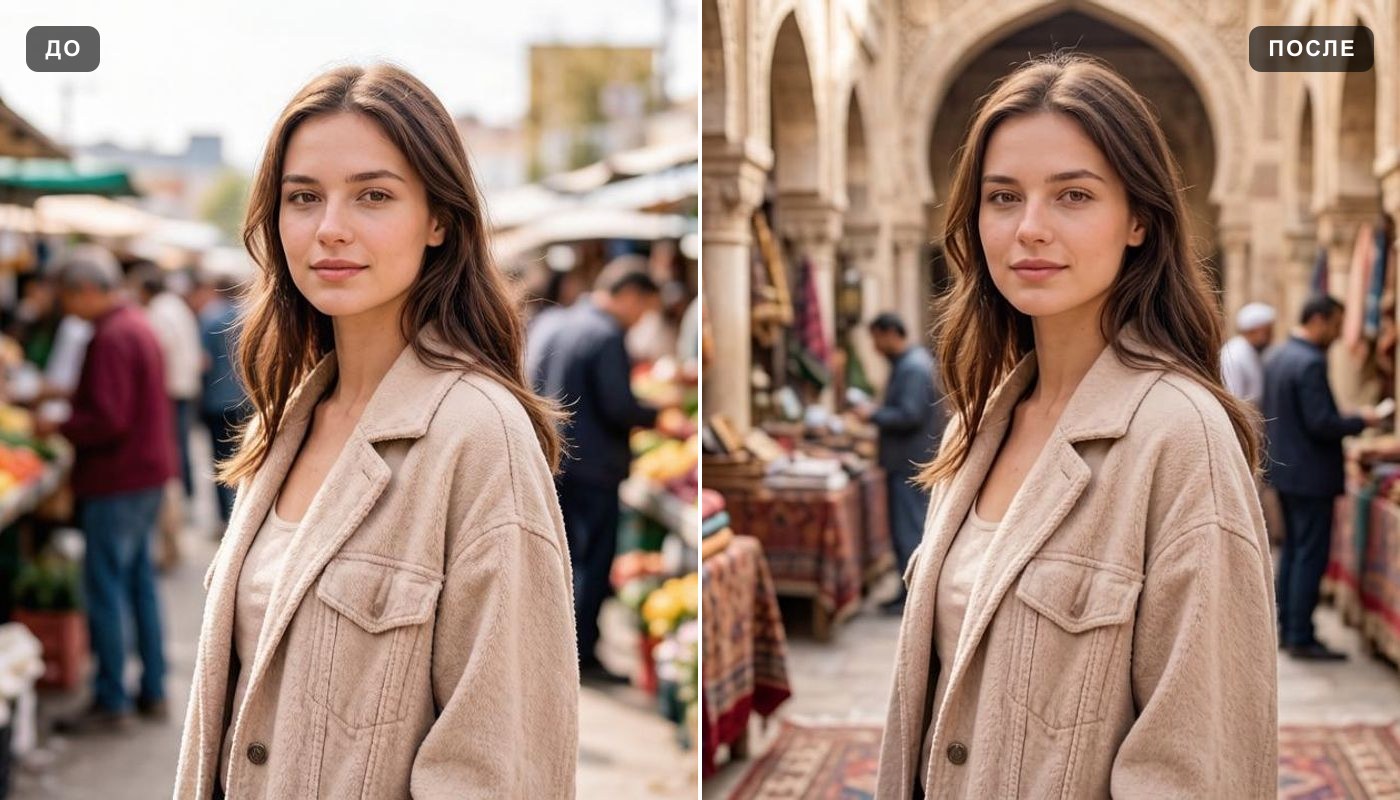
Two different jobs, one door apart. On this page the background goes away and you decide what, if anything, goes behind the subject — that is what makes the file reusable. If what you actually want is a finished frame with a new setting already in it, described in your own words — a studio sweep, an office, a city street, a beach, a plain colored field — that belongs on change background, where the new scene is generated behind the subject in one step and comes back as a complete picture.
Runs in your browser: devices, formats and file size
There is no app to install. The page opens in a browser on an iPhone, an Android phone, a laptop or a tablet, and nothing asks for access to your camera roll — you pick one photo yourself. Results are kept in your account, so a cutout made on a phone is waiting for you on a desktop when you sign in there.
Accepted formats are the ones printed on the upload panel: JPG, PNG, WEBP — up to 10 MB. There is no minimum resolution on what you send. HEIC and HEIF files from an iPhone are not accepted — either set the camera to save as "Most Compatible", or share the photo once to yourself, which converts it to JPG on the way.
Will the cutout lose resolution?
Here is the whole chain, plainly. Your file goes through at the quality you uploaded it at, and the cutout comes back as a newly rendered image — Pro renders it at a higher resolution than Standard.
One detail matters specifically here and it works in your favor: because the result carries transparency, it stays a PNG and is not re-encoded as a JPEG. PNG compression does not invent the blocky speckle that JPEG leaves along high-contrast boundaries, which is exactly where a cutout is most fragile. The edge you get is the edge the model drew.
What this is not is an enlarging tool. If the finished PNG needs to be bigger than what comes back here — a poster, a large print, a full-width hero image — enlarge the photograph first with the image upscaler and remove the background as the last step. Done in that order the transparency ends up in the final file; done the other way round it may not survive.
What to keep in mind
Free background removal and where the limits are
You can try it for free. A new account gets two free generations in total — not two a day and not two a month — and this tool is one of the ones they cover. Free runs use Standard quality; Pro runs are part of a paid plan. After that the work continues on a plan or a pack, and the terms are on the pricing page.
Downloading is open here from the start: the transparent PNG is the whole point of this tool, and a cutout you cannot save is not a cutout. That is not true of every generator on the site, so it is worth knowing which door you came in through.
One thing to know before you plan around it: free runs carry a light ai.neiroset.com signature in the bottom-right corner of the frame. It is not a penalty attached to the free run — any purchase removes it permanently, including from images that were already generated.
There is also a pace limit of six runs a minute per account, which ordinary use never comes close to.
Do I need an account?
Yes. You can fill in the whole form as a guest, but pressing Create opens the sign-in window. Results are saved to your own History, which is what lets you come back to a cutout tomorrow, compare it against the original and open it from another device — without an account there would be nowhere to keep it and it would be gone the moment the tab closed.
Frequently asked questions
How do I remove the background from an image?
Upload the photo, pick the Standard or the Pro mode and press Create. The AI finds the subject on its own — there is nothing to trace or erase by hand — and the cutout appears in History beside the original, ready to save as a PNG.
Will the background really be transparent?
Yes. This tool returns a PNG with a real alpha channel, so the background pixels are empty rather than painted white. The gray-and-white checkerboard you see in the preview is how transparency is drawn on screen; it is not in the file.
I downloaded the file and the background is white. What happened?
Somewhere along the way the image became a JPEG, and JPEG has no way to store transparency — every empty pixel has to be given a color, and that color is normally white. Check that what you saved is a .png, and watch for the steps that convert quietly: an "export as JPG", a compressor, an email attachment, a chat app, an old template. The cutout itself is fine; it just needs to stay in a format that can hold the transparent part.
Can it cut out hair and fur?
Yes — the shape of the hair and the individual strands along the edge of the silhouette come through, and fur behaves the same way. The very finest flyaway hairs can be lost, especially against a patterned background or one close to the hair in color. A photo where the subject stands clear of what is behind them gives the cleanest edge.
Will there be a glowing outline left from the old background?
Usually not, but it is the thing to look for. A halo is old background color that the camera blended into the boundary pixels, and it shows up most when the subject and the scene behind it are close in tone. Check the result on a dark background as well as a light one — a fringe that hides on white is obvious on black.
How do I get a plain white background for a marketplace listing?
Take the transparent PNG and place it on a white canvas in any editor, at the dimensions and margins the storefront asks for. You stay in control of the framing that way. If you would rather have the finished frame produced for you, use change background and describe a clean, evenly lit studio field. Image rules differ by platform and get updated, so check the current requirements where you sell.
Can I remove the white background from a logo?
Yes, and flat graphics with hard edges are among the easiest things to separate. Upload the JPG of the mark and the white field comes off, leaving the logo on transparency. It stays a raster image though — it does not become a vector — so if you need it much larger, enlarge the original first with the image upscaler, then take the background off.
Can I make a transparent PNG of my signature?
That is one of the most useful things this tool does. Sign white paper in dark ink, photograph or scan it straight on in even light, crop close and upload. What comes back is the ink alone on empty pixels, so it can be placed in a document, a form or an email footer without a white rectangle hiding the line underneath. Whether a given organization accepts an image of a signature is their decision, not something this page can promise.
Can I use the result for stickers?
Yes — a transparent PNG is exactly what a sticker starts from, whether it ends up in a WhatsApp or Telegram pack or on printed merchandise. The apps and the print shops each have their own size and format rules, so follow the current ones at the destination; this tool supplies the artwork. For anything being printed, use Pro, which returns a larger file.
Does it alter the subject itself?
No. The person or the object is separated from its surroundings, not redrawn. Faces are not smoothed or reshaped, colors and materials stay as they were photographed, the pose and the crop are untouched. That also means a cutout will not fix a photo that is dark or soft — handle that first with the photo enhancer.
What size will the finished PNG be?
Your file goes through at the quality you uploaded it at, and Pro renders the cutout at a higher resolution than Standard. Because the result carries transparency it stays a PNG rather than being re-encoded as a JPEG, so the edge does not pick up compression speckle.
What files can I upload?
JPG, PNG, WEBP — up to 10 MB, as the upload panel says. There is no minimum resolution. HEIC and HEIF from an iPhone are not accepted — set the camera to "Most Compatible" or share the photo to yourself once to get a JPG.
Does it work on a phone?
Yes. The page runs in a mobile browser on iOS and Android with nothing to install, and the cutout is saved to your account so you can open it later on a computer.
What if I want a new setting behind the subject instead of nothing?
Then you want the tool next door. Change background generates a new scene behind the subject from a description and hands back a finished picture, rather than an empty PNG you assemble yourself.
Who can see the images I upload?
On the higher paid plans a Private switch keeps a run out of the public feed — with it on, only you. Without it, a result may be shown in the site's gallery of work. The switch sits next to Create, so turn it on before you start the run rather than after.
Try other tools
 Change background
 Photo enhancer
 Image upscaler
 Unblur image
 Colorize photo
Virtual staging
Colorize photo
Virtual staging
 Interior design
 Anime style
Everything else is in the tools catalog.