AI Watermark Remover: Remove a Watermark From Your Own Photo
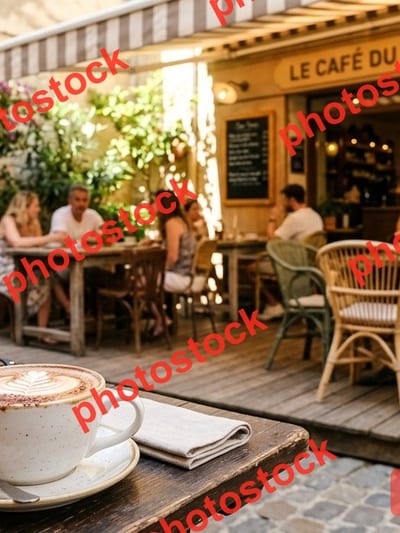
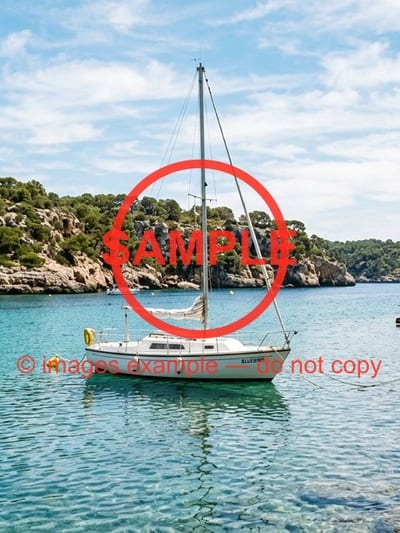
Upload a photo of your own and the model clears the mark, then paints back what was under it: the same sky, wall, lawn or tablecloth, instead of a smudge over the spot. There is no brush and nothing to click here, so one line in Additional wishes is how you say which mark you mean, from "remove the date stamp in the bottom right" to "keep the sky untouched". What comes back is a plausible continuation rather than the original pixels, which is why a corner date or a small logo goes cleanly while a translucent slab across a face leaves a trace. This is a tool for photographs you took or hold the rights to change; taking a mark off somebody else's work is a different thing, and the page below says plainly where that line runs.
Drop your photo here
JPG, PNG, WEBP — up to 10 MB. You will select the object right on the photo.

 BeforeAfter↔
 BeforeAfter↔
How to remove a watermark from your own photo in three steps
Nothing to install. There is no brush here and nothing to click on the picture: this is a form, so words are the whole steering mechanism, which is why the wishes field gets a section of its own below. It works on still photographs — camera frames, scans, screenshots — not on video or sound. One thing is worth settling before you upload anything, though, because it decides whether you belong on this page at all.
Your own photos only — and what US law says about the rest
This tool exists for one situation: the photograph is your own, or you own the rights to change it. Your frame with the date your own camera burned into the corner. Your logo on your product shot, from a brand you have since retired. A photographer clearing their own credit off their own picture. In each of those the only person with a claim on the image is you.
Fine on your own photo
Not on somebody else's
That second list is not a formality, and in the United States it is not only a copyright question. Section 1202 of the DMCA — 17 U.S.C. §1202, on copyright management information — makes it unlawful to remove or alter the information that identifies a work and its owner, including an identifying mark, a credit line and the ownership data carried in the file, when the point is to hide an infringement. It carries penalties of its own, on top of the copyright claim underneath. A tool cannot tell whose photograph it is looking at; you can.
And a removal changes the picture, nothing more. It does not change who made the photograph, who holds the rights to it, or what you may publish. So if what you need is the clean version of a picture that is not yours, the route is the boring one: license it, or ask the person who made it. That gets you the real original at full size — a better file than any reconstruction, since a model can only invent a plausible continuation while the owner still has the pixels that were there.
One more case belongs here. A signature that is doing a job — on a contract, a form, an authorization, a record somebody else will rely on — is not decoration, and taking it out of a photo of that document is forgery rather than editing, whoever owns the paper. Do not use this for that.
What an AI watermark remover actually does
A watermark is not a layer. It may have been one in the editor where it was made, but the moment the file was saved as a JPG the mark and the photograph became the same pixels. There is nothing to switch off and nothing to peel away: a program looking at that file sees one image with pale letters in it, the same way it sees a lamp post.
So the job is reconstruction, not extraction. The model reads what surrounds the marked area, works out what the surface underneath was most likely doing, and paints that continuation in place of the mark: sky continues as sky, a brick wall continues as brick. Two things decide how well it goes, and neither of them is the tool: how much of the frame the mark covers, and how interesting what sits under it happens to be.
Where a mark is solid, the pixels under it are simply gone and the model invents a small area of something predictable. Where a mark is translucent — the usual case for a big diagonal wordmark — every pixel in that area is a mixture of two things: the photograph, and the lightening laid over it. The model has to guess how much of each, with nothing to check its answer against. Get the mixture slightly wrong and the letters vanish while a faint rectangle of the wrong brightness stays behind. That is the ghosting people describe as "you can still see where it was".
It is also why a face is the worst place for a mark to sit. Skin is made of smooth gradients, so a brightness error shows at once, and a viewer inspects a face the way they inspect nothing else in a photograph; rebuild part of an eye or the edge of a mouth by likelihood and the person can come back subtly not themselves. A thin date stamp over a lawn has none of those problems: one surface, a short run of characters, nothing anybody will study.
What ends up where the mark was
A plausible continuation of the surroundings: not a smudge, not a blurred rectangle, not a solid patch of average color. And this is the sentence to keep. A plausible continuation is not the original photograph. The pixels under the mark left the file when the mark was flattened into it, and nothing here brings them back. What returns is the most likely version of that surface, which over a lawn or a plaster wall is indistinguishable from the truth and over a patterned rug or a cheekbone is a reasonable invention. The version without the mark exists in exactly one place: with whoever made the picture. The comparison sliders near the top of this page are there for that check — drag the handle across the old spot and look at the edges of the cleared area first, then any repeating pattern, then faces.
One property of this tool to know before you compare: the frame comes back at the same size, the same angle and the same crop you uploaded, and nothing is quietly cropped to hide the repair. But the picture is re-rendered rather than patched, so fine detail elsewhere can shift a little — lettering on a sign, the weave of a fabric, a thin chain. On a photograph that matters, look over the whole frame in History, not only the spot you were fixing.
Marks that come off cleanly, and marks that leave a trace
The outcome is easy to predict once you know what the model is doing. Small, thin and over one surface is the good case; large, translucent and over something detailed is the bad one.
Usually clean
Expect a trace
One practical consequence: upload the biggest version you have. On a small frame the mark and the surface under it are both a handful of pixels, and there is barely anything to continue from.
When the mark runs across the whole frame
This is the case to be honest about, because it is the one people arrive with most often and the one that works least well. A repeating grid of translucent lettering, tiled edge to edge, is not a mark sitting on top of a picture; at that point it is mixed into every part of the picture, and there is no clean neighboring area to continue from.
The model would have to separate the overlay from the image across the entire frame and invent the parts where the letters are solid, with no untouched region anywhere to calibrate against. What comes back tends to read clean at a glance and fall apart the moment you look properly: a faint lattice of brightness where the grid was, soft patches instead of texture, lettering on signs turned into shapes, faces that have drifted.
So, plainly: a mark tiled across the whole frame is a failure case, not a slow case. Running it another three times does not rescue it — each pass builds on the previous invention. If the picture is your own and you still have the unmarked master or the raw file, use that instead: it takes half a minute and the result is real. If it is not your own, the section above already answered it.
The middle ground does work, and it covers most real jobs: a grid over part of the frame only, a sparse pattern over a simple background, or the common pairing of one badge in a corner plus one line of text along the bottom edge.
What to write in Additional wishes
There is no brush on this page and nothing to click, so the wishes field is the only way to say which mark you mean and what has to survive. It is optional — leave it empty and the model works on the marks it finds — but one specific sentence changes the result more than anything else here. Write it the way you would point at the photograph: name the mark, name the corner, name what must stay. Two or three instructions land reliably; past about five they start competing and the weakest are dropped.
That last one matters more than it looks. A shop sign, a license plate, a number on a jersey, a label on a bottle are all part of the photograph, and a model told to clear away "the text" can take them with it. If the frame contains lettering that belongs there, say so in the same breath as the removal.
Next to the field sits Improve description, which rewrites your line into a fuller instruction. It is a paid action on the same footing as a run, so it draws on your plan: on something as short as "remove the date stamp in the bottom right" there is nothing for it to improve, and it earns its keep only on a complicated frame.
If a first attempt leaves an outline, do not rewrite the whole instruction. Download that result, upload it again and ask for the leftover specifically: "remove the faint rectangle in the middle of the frame and even out the brightness". Each pass is a run of its own, so two careful attempts beat five vague ones.
Instructions you can copy
Paste one of these into Additional wishes and swap in your own corner, surface and detail.
A date stamp on your own photo
Remove the date and time stamp in the bottom right corner. Continue the surface underneath it and leave the rest of the photograph exactly as it is.
Your own logo in a corner
Remove the small logo in the top left corner and continue the background behind it. Do not change the colors, the contrast or anything else in the frame.
A large translucent mark across the middle
Remove the large translucent lettering across the middle of the photo and continue the wall behind it evenly, with no patch of different brightness. Do not smooth the texture and do not change the faces.
A leftover after a first pass
Remove the faint rectangle left in the middle of this photo and even out the brightness so that it matches the area around it. Do not change anything else in the frame.
Where a removal is the honest answer
Every safe case has the same shape: the mark was put there by you, or by your own equipment, on a photograph nobody else can claim.
Two of those deserve a footnote. For a marketplace listing the picture has to be your own product shot — a manufacturer's image with the manufacturer's mark on it is theirs, whatever a reseller agreement says about using it. And if you shot the photograph for a client, the rights may sit with them by contract rather than with you; if a mark is on the file because somebody asked for it, ask them before you take it off.
Marks, text and objects: which tool fits
A mark of ownership, a piece of text and a thing in the scene are three different jobs on three pages, and picking the right one saves a run. They overlap in one place: a studio name typed across a corner is both text and a mark, either page will take it off, and the rights question is identical on both.
Formats, free runs and limits
There is no app to install; the page opens in a browser on an iPhone, an Android phone, a laptop or a tablet, which suits the most common version of this task: you notice the date burned into a photo on your phone and deal with it there and then.
Accepted formats are the ones printed on the upload panel: JPG, PNG, WEBP — up to 10 MB. There is no limit on the resolution of what you upload, and the file goes to processing at full quality rather than being shrunk on the way in. HEIC and HEIF files are not accepted — either set the iPhone camera to "Most Compatible" in Settings, or share the picture to yourself once, which converts it to JPG along the way.
The result comes back with its long side at 1024 px on Standard and 2048 px on Pro, at full size with no extra compression on the way out. For a mark over fine detail, Pro is the one to use: the larger frame makes it far easier to see what was rebuilt.
A new account gets two free generations in total — not two a day and not two a month — and this tool is covered by them. Free runs use Standard quality; Pro belongs to a paid plan and does not spend a free run. After that, work continues on a plan or a pack, and the terms are on the pricing page.
One thing to know before you start rather than after, and there is no graceful way to say it on a page about marks: until an account has made a purchase, results come back carrying a light ai.neiroset.com signature in the bottom-right corner. Any purchase removes it permanently, including from images already generated. The Download button, on the other hand, is open from the first run here. There is also a pace limit of six runs a minute on an account, which ordinary work never comes close to.
Do I need an account?
Yes. You can fill in the whole form as a guest, but pressing Create opens the sign-in window. Signing in is also what puts every attempt into History beside the photograph it came from, and comparing a repair against its original is the only way to judge one.
What to keep in mind
Frequently asked questions
How do I remove a watermark from my own photo?
Upload the picture, write one line in Additional wishes saying which mark you mean — "remove the date stamp in the bottom right" — choose Standard or Pro and press Create. The cleared frame appears in History beside the original, and Download is open from the first run.
Can I remove a watermark from a photo I did not take?
No. On your own photograph, or one where you own the rights to change the image, yes — your own logo on your own picture, the date your camera stamped into the corner, your own signature on your own work. On a picture somebody else made — a frame you found online, a stock image, a library preview, a photographer's proof — no. The mark is there to identify the owner, and removing it can infringe US copyright law, including §1202 of the DMCA, which covers copyright management information and carries penalties of its own. Whether the edit is technically possible is not the question that matters; whose photograph it is, is.
What ends up where the mark was?
A continuation of what surrounds it — the same sky, wall, grass or fabric — rather than a blurred patch. It is a plausible reconstruction, not the original pixels: those left the file when the mark was flattened into it. Over plain surfaces the difference is invisible; over a face or a fine pattern it is worth checking.
Will a mark tiled across the whole frame come off?
Not well, and it is fairer to say so than to let you spend runs finding out. A repeating grid is mixed into every part of the picture, so there is no clean area to rebuild from: expect a faint lattice of brightness, softened detail and faces that have drifted. Repeat passes make it worse. One badge in a corner plus a line of text at the bottom, on the other hand, comes off cleanly.
Can I take off only the date stamp and keep everything else?
Yes, and this is what the wishes field is for: "remove the date stamp in the bottom right and leave the rest of the photo as it is". If the frame has lettering that belongs in the scene — a shop sign, a license plate, a label — name it as something to keep, otherwise it may go along with the mark.
A faint outline survived. What now?
Download that result, upload it again and describe the leftover rather than the original mark: "remove the faint rectangle in the middle of the frame and even out the brightness". One targeted second pass usually clears a ghost. Many passes do not — each rebuilds on the last invention.
Will there be a mark of yours on the result?
Until an account has made a purchase, yes: a light ai.neiroset.com signature sits in the bottom-right corner of results — an awkward thing to admit on this page, so here it is plainly. Any purchase removes it permanently, including from images generated earlier. Your own uploaded file is never modified either way.
Is it free, and do I need an account?
A new account gets two free generations in total, at Standard quality, and this tool is covered by them. An account is required: the form can be filled in as a guest, but pressing Create opens the sign-in window. Pro quality and further runs belong to a paid plan, and the terms are on the pricing page.
The photo is small and soft. Should I clear the mark first?
Clear the mark first, then enlarge: the removal reads the surface around the mark, so it does better on the largest copy you have. Afterwards send the result through the image upscaler, or unblur image if the shot missed focus.
Does it work on a phone?
Yes. The page opens in a mobile browser on iPhone and Android, and there is nothing to install. One thing to remember: HEIC files straight from an iPhone are not accepted, so save or share the picture as JPG first.
Try other tools
 Text remover
 Object remover
 AI photo editor
 Photo enhancer
 Unblur image
 Image upscaler
 Background remover
 Colorize photo